February 3, 2018

Whimsy February Release - Day 3


Happy Weekend Everyone! Today is day 3 of our 6 day Whimsy  FebruarRelease celebrations! To see all showcased products from today please visit the Whimsy Inspirations Blog
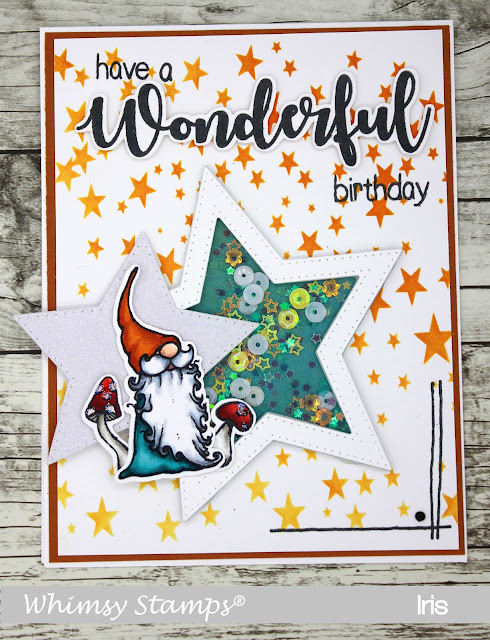
I have a shaker card to share today using several new and older Whimsy products. 


The sweet gnome is from a NEW clear set called 'Gnome Sweet Gnome'. I colored using my Copics. The sentiment is from the NEW You're My Favorite clear sentiment set by Deb Davis. The star shaped shaker element was created using the Pierced Stars die set. To give it a little dimension and have the shaker element sitting on top of the card rather than behind the cardstock layer, I cut out a piece of fun foam with the star dies for a 3D effect. The shaker filling is a mix of different sequins and glitter shapes. To create the star spangled background I used the NEW Star Galaxy Stencil. I sponged it using my distress ink pad Spiced Marmalede. For the darker stars I went over it several times to achieve a real nice deep orange color. The little corner element was stamped with Versafine ink and is from the FADoodles Too set.


Copic colors used:

Red R39, R37, R35, R32
Orange YR9, YR18, YR15
Turquoise BG49, BG57, BG45, BG53
Grey C5, C3, C1, B41
W4, W2, W0
Skin E00, E11, E04


Whimsy Products used:

*NEW Gnome Sweet Gnome   *NEW You're My Favorite   Pierced Stars Die Set   *NEW Star Galaxy Stencil

Copic Sketch Markers Cadmium Red [Pack Of 3] (3PK-R27S)   Versafine Full-Size Ink Pad - Onyx Black   FaDoodles Too   Orange Blossom Sequin Pack


Thanks for stopping by and come back tomorrow for another day of release fun!

Hugs,


February 2, 2018

Whimsy February Release - Day 2


Welcome back crafty peeps! Today is the second day of the Whimsy February Release - four more release days to follow!
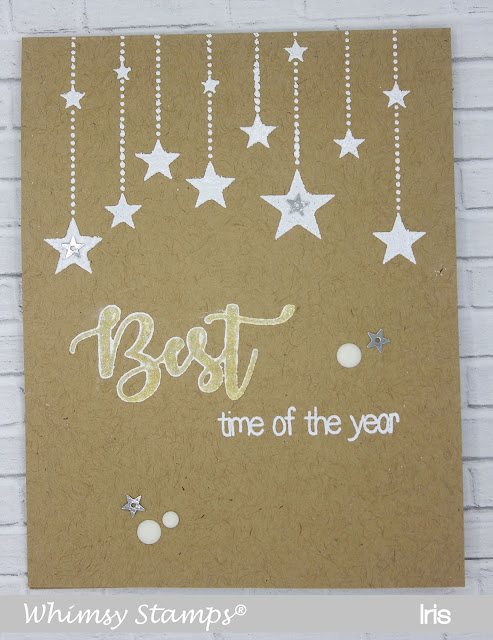
Stencils, stencils stencils, .... there are several new stencils in this months release. My Inspiration card for today showcases the Star Dangle stencil  as well as the  You're My Favorite sentiment set on a kraft colored one layer card.


I used a 4 1/4 x 5 1/2 inch top fold card made from heavy kraft cardstock. I embossed the  Star Dangle stencil using Versamark clear ink and heat embossed with Ranger's white embossing powder. The sentiment is from the NEW You're My Favorite clear sentiment set and was stamped using white pigment ink and then heat embossed with Ranger's white and enchanted gold embossing powders. Look how gorgeous the gold embossed large word turned out. The white pigment ink underneath the gold embossing powder looks like it has an outline. I love this effect!
To add some bling I decorated the card with white enamel dots and sequin stars.


Here is a list of Whimsy products I've used:

*NEW Star Dangle Stencil   *NEW You're My Favorite   White Embossing Powder  VersaMark Full-Size Ink Pad - Original (Clear)     Christmas Cheer Enamel Dots   


Thanks for dropping in and see you tomorrow for Day 3 of our amazing Whimsy Stamps February Release!

Hugs,


February 1, 2018

Whimsy February Release - Day 1

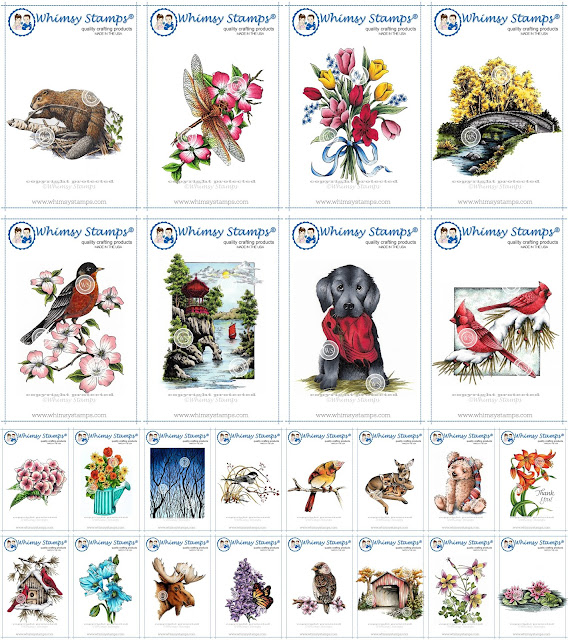
Hello Everyone and Welcome to Day 1 of Whimsy's February 2018 release week. We have 6 jam packed days coming up showcasing all of the newest release goodies which are available in the store NOW. Click here to go shopping for the new goodies.  

We also have super fun news today. Whimsy Stamps is proud to be carrying Jennifer Dove's Dove Art line of stamps exclusively. We are thrilled to be working with Jennifer and to be able to bring you this wonderful lineup of stamps.  For my release creation with one of the Dove Art images please scroll down.


Here is what I came up with for todays first release day using Himalayan Poppy:


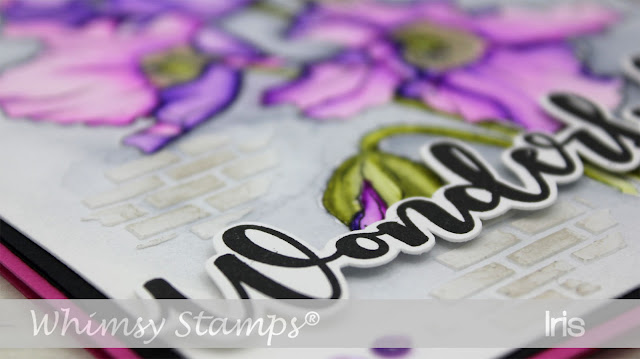
I water colored the image using ZIG Brush Pens as well as Gansai Tambi water colors. This time I used the ZIG pens directly on the wet watercolor paper and then spread the color using a water brush. See below for a list of colors used I used. To do the background I used the Brick Pattern Stencil  and some modeling paste to add a little dimension. After the modeling paste was dry I sponged it very lightly with a blending sponge and Pumice Stone Distress Ink to just add a hint of color. The sentiment set is from the NEW You're My Favorite sentiment set. I stamped it with Versafine Onyx Black ink and fuzzy cut it. To add a little bling I used some sequins


Here is a closer look on the background with the brick pattern:


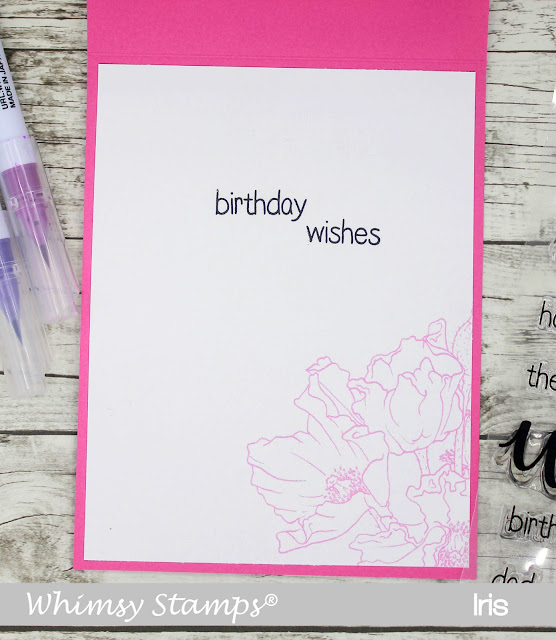
and here is the inside of the card with the rest of the sentiment. I stamped part of the image with pink ink in the lower right corner:


Zig Clean Color Brush Pens used:


082 purple
084 deep violet
081 light violet
043 olive green
046 mid green
902 natural grey - was used around the image

Gansai Tambi:


No. 904 gold

Wink of Stella Brush Glitter Pen:

080 violet


Whimsy products used:

Brick Pattern Stencil   Himalayan Poppy   *NEW You're My Favorite   Wild and Free Sequin Pack   Painted Garden Sequin Pack 


Thanks for stopping by and make sure to come back tomorrow for day two of the February release!

Hugs,


January 31, 2018

Forever In My Heart


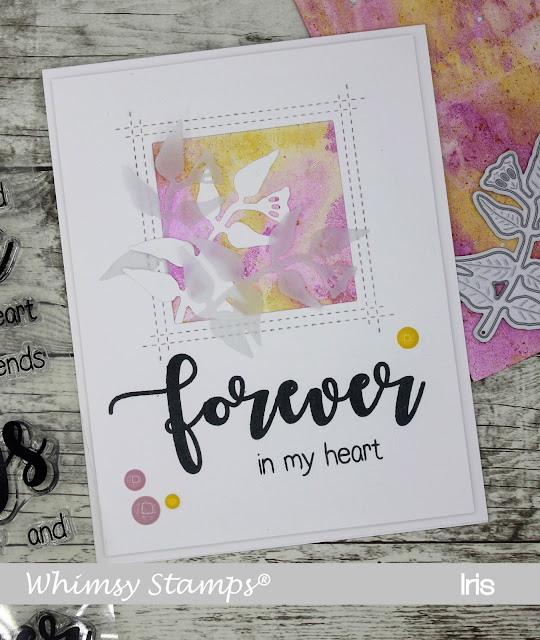
Hello Friends and Happy Hump-Day! Today I want to share a quick card with you. It's a CAS style card with just a few die cuts and a sentiment. To give it more interest I added a self-made alcohol ink background paper and vellum die cuts. The sentiment and leaf dies are from Whimsy Stamps. Find all the details below.

NEW WHIMSY FEBRUARY RELEASE INFO Here is a little reminder that tomorrow starts Whimsy's February release week. We have exciting news and I know you will be loving all the new goodies! All products will be available in store tomorrow and the creative team will be showcasing the new release items over the next 6 days! So mark your calendars and make sure to come back to my blog. I will be showcasing on at least 5 of the six days. You can also visit the Whimsy facebook page and the Whimsy Inspirations Blog for new release inspiration or go directly to the Whimsy store to see all the goodies that are availabe for purchase.


The marbeld alcohol ink background paper was done after a tutorial from Jennifer McGuire. I love how it turned out. I used Ranger Adirondack Alcohol Inks, Butterscotch, Wild Plum and Mixative silver. I just used a small piece of the BG paper on this card but I have a larger piece I want to use on another card soon - you can see it in the photo. Then you can see the nice shiny spots the silver mixative left behind :-).


I cut a 4 1/4 x 11inch panel from heavy weight cardstock and folded it cross-wise to have an A2 size top fold card. I then cut another layer of white cardstock measuring 4 x 5 1/4 inch. From that I cut out a window with a little window square die from MFT . The sentiment - Whimsy Stamps You're-My-Always clear set - was stamped underneath the window using Versafine Onyx Black ink. I used a leaf foliage die from the Whimsy Leaf Foliage 2 die set and cut one branch from white cardstock and two from heavy weight vellum.  I adhered the BG paper behind the window and the foliage branches on top slightly overlapping - see photo. To finish up my card I added the decorated layer to the card base using foam tape and added some matching enamel dots from the It's a Party Enamel Dots.


Whimsy products used:


*NEW You're My Always   *NEW It's a Party Enamel Dots   Leaf Foliage 2 Die Set  Versafine Full-Size Ink Pad - Onyx Black 


Thanks for stopping by!

Hugs,


January 22, 2018

Cupid in Training

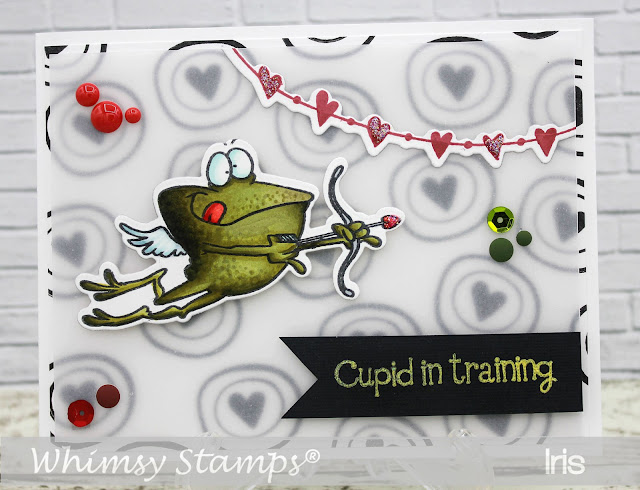
Happy Monday! I've to share another Valentines card today. I used a clear stamp set from Whimsy's December 2017 release, 'Cupid in training', as well as the coordinating dies 'Cupid in training die set'. Both are illustrated by the very talented Deb Davis from Amped to Stamp.


My card base is 4 1/4" x 11" folded cross-wise. I made my background by stamping the little target image all over a layer of white cardstock (5 1/4" x 4") using Versafine onyx black ink and attched it to my card base. I then cut a layer of heavy vellum paper (5 1/8" x 3 7/8") and layered in on top of my background using clear foam tape. I colored the Cupid with Copics and stamped the heart garland with Memento Love Letter ink. Both were cut out using the coordinating dies from the 'Cupid in training die set'. The sentiment is included with the  'Cupid in training' clear set. I stamped the sentiment onto black cardstock with Avery Elle 'Daisy' pigment ink and heat embossed with Rangers 'Enchanted Gold' embossing powder. Unfortunately it is hard to see but this EP has such a nice sparkle to it IRL. To finish up my card I added some enamel dots, sequins and Stickles Stardust glitter glue.


Copics used:

R22, R24, R29
YG91, YG93, YG95, YG97, YG99
B000, B01
BG000
C3


Whimsy store items used:

Cupid in Training   Cupid in Training Die Set   Christmas Cheer Enamel Dots   Versafine Full-Size Ink Pad - Onyx Black   Copic Sketch - B000 Pale Porcelain Blue   Copic Sketch - B01 Mint Blue   Copic Sketch - BG000 Pale Aqua   Copic Sketch - C3 Cool Gray   Copic Sketch - R22 Light Prawn    


Have a great day!


January 16, 2018

Happy Chocolate Day!

Hi Everyone! Today I have some Valentine inspiration for you. On my card I am showcasing a clear stamp set from the December 2017 release called Crazy For Chocolate, an older large word die 'Happy' and the newly released Polka Dot Stencil.


To make this card I started by cutting my card base 4.25" x 11" from heavy weight bright white Hammermill cardstock. Folding it in half cross-wise. Using the  Polka Dot Stencil and some pink Nuvo Embellishment Mousse I created the dotted background. I colored the bowl of chocolate from the Crazy For Chocolate set using Copic alcohol markers and cut it out using the coordinating Crazy For Chocolate die set. I've added Stickles Sprinkled Sugar to the top of each candy. Once it's dry it really looks like sprinkled sugar crystals. I love that it looks so real! Hre see for yourselves:


The sentiment was partly cut out from brown cardstock using the  large word die 'Happy' and the other part was stamped directly on the card base. The chocolate bowl and the word Happy were attached with some foam tape to give some dimension to the card. To add some bling I adhered pink enamel dots from the  It's a Party Enamel Dots set , brown Sequins and pink rhinestones between the polka dots.

Here is another close-up of the polka dots made with Nuvo mousse. It gives such a nice effect on the card. I love using structure paste or embellishment gels/mousse with stencils for adding dimension and special effects.


For more inspiration please also visit also my Whimsy Pinterest Gallery


Copic markers used:

R81 - R83 - R85
E23 - E25 - E27
C00 - C1 - C3 - C4 - C5

Here is a list of Whimsy products and products available in the Whimsy shop:

*NEW Polka Dot Stencil   Happy Large Word Die   Crazy for Chocolate   Crazy for Chocolate Die SetStickles Glitter Glue - Sprinkled Sugar   *NEW It's a Party Enamel Dots   Copic Sketch - R81 Rose Pink   Copic Sketch - R83 Rose Mist   Copic Sketch - R85 Rose Red    Copic Sketch - E25 Caribe Cocoa   Copic Sketch - E27 Milk Chocolate   Copic Sketch - C00 Cool Gray   Copic Sketch - C1 Cool Gray    Copic Sketch - C3 Cool Gray   Copic Sketch - C5 Cool Gray   


Thanks for stopping by!

Hugs,
Iris